The January 2011 Daring Bakers’ challenge was hosted by Astheroshe of the blog accro. She chose to challenge everyone to make a Biscuit Joconde Imprime to wrap around an Entremets dessert.
I was really excited to take part in my first challenge until I saw that it was some poncy French cake! As I read the print out I was terribly confused. I had to research for about three days until it finally made sense to me how this cake is put together.
It's basically an almond cake wrapped around the sides and on the bottom. It's then filled with whatever you can imagine! Mostly fruit and mousse and sometimes topped with a fruit coulis, compote or gelatine. In the end the hardest part ended up being making a dairy free mousse to go in mine.
My boss at work is French so I asked her what she thought of a Jaconde and in her opinion it's something to be enjoyed more in the spring or summer time and should include plenty of fruit. Since it's the dead of winter right now I thought a chocolate mousse layered with strawberries would be nice. My layers starting from the bottom are:
1. Cake
2. Chocolate Mousse
2. Sliced Strawberries
3. Cake
4. Chocolate Mousse
5. Sliced Strawberries
6. Fruit Gelatine
7. Whole Strawberries (for decoration)
This ended up taking me nearly ALL day for ONE cake! I would recommend that you make your mousse and chop any fruit the day before. Once the mousse has set you can spoon it into your cake.
The chocolate mousse I made doesn't have any cream so it's very light. It was difficult for it to retain it's shape in the cake but tasted delicious. If you're going to embark on this dessert make sure you read through the whole recipe first. This is definitely one of the hardest desserts I've made.
Chocolate Mouse
adapted from The Guardian
Ingredients
120g dark chocolate chopped
4 eggs
4 tsp sugar
1. In a small bowl whisk the egg whites until stiff peaks form. Whisk in the sugar and set aside.
2. Over a double boiler melt the chocolate. Once melted quickly whisk in the egg yolks. Fold in the egg whites until combined. Refrigerate for 4 hours minimum until set. This mousse is quite thin so I didn't pour it straight into the cake. A mousse made with whipping cream can be poured straight into the cake tin!
I made two 9 inch cake rounds to use as layers between my mousse. I used a white cake recipe from Joy of Baking. Once they were cooled enough I wrapped them in cling film and put them in the freezer. It's easier to layer when the cake is firm.
If you only plan on using cake for your bottom layer then there should be more than enough trimmings from the Jaconde coming up to use on the bottom.
Joconde Sponge
from The Darking Kitchen
Ingredients
85g ground almonds
75g icing sugar
25g self rising flour
3 large eggs
3 egg whites
10g caster sugar
30g unsalted butter, melted.
1. In a small bowl whip the egg whites and granulated sugar until stiff peaks form.
2. Sift together the ground almonds, icing sugar, and cake flour.
3. On medium speed, add the eggs a little at a time. Mix well after each addition until smooth and light. Fold in one third of the whipped egg whites to lighten the batter. Fold in the remaining whipped egg whites. Add in the melted butter and put the batter aside for later.
Next to make is the paste that will make the pattern on the outside of the cake.
Patterned Joconde Decor Paste
Ingredients
200g unsalted butter at room temperature
200g icing sugar
7 large egg whites
220g cake flour (self rising flour in the UK)
Food coloring
1. Cream the butter and sugar together until light and fluffy, gradually add the egg whites and beat continuously. Fold in the sifted flour and tint to whatever color you fancy!
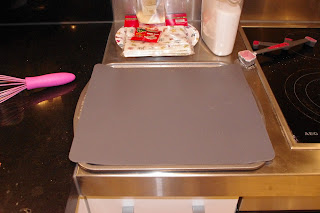
Now it's time to put everything together. Start by taking a baking tray and placing a silicone mat on top. Make sure the mat is the wrong way around and the bottom is facing up. My mat is slightly bigger than my baking tray but it still worked out quite well.
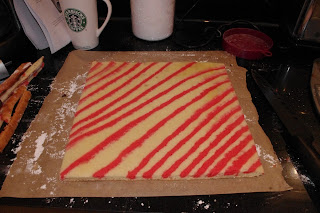
Here is where you can get creative. You can do stripes, circles, swirls, writing. If you want split your paste in two parts and make 2 different shades. Once your finished place the tray in the freezer for 15 minutes.
Luckily my baking tray was exactly the same size as my tiny English freezer. The flat I used to live in the freezer was the size of a shoe box!
Take the tray out of the freezer (make sure the paste is hard) and very gently pour the Joconde batter over top and spread evenly across the whole area. Bake at 240 C for 15 minutes.
The edges of mine were a bit burnt but it doesn't matter because they'll be trimmed off later. Let cool for a few minutes but no too long or it will stick and your design will be ruined.
Place a piece of parchment paper on the counter lightly dusted with icing sugar.
Flip the tray over
Peel away your silicone mat. I also cut away the crispy edges.
I cut my square of cake into three equal sized strips and tightly pack it around my cake pan. Really get the edges to come together tight so none of the filling will seep out. The Joconde is pretty flexible but be careful not to crack it.
Now you can start layering. I put my cake round on the bottom with strawberries on top. I stuffed the small gaps at the bottom with Joconde scraps.
Keep layering mouse, cake, strawberries, mousse. I then trimmed the top cake a little bit so it was a fraction higher than the mousse layer.
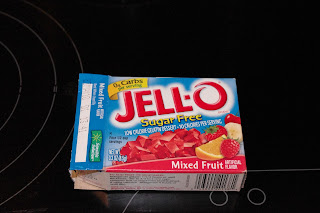
I had big plans to make my own strawberry gelatine topping but at this point I'd been in the kitchen for hours and couldn't take any more. I caved and made some Jell-O. I mixed it up and poured a tiny bit on top of the mousse but it didn't react well so I poured it into a lightly greased cake round that was the same size as the cake. Luckily after a few hours I was able to flip it on top of the mouse.
I put a few decorative strawberries on top (glued down with some leftover frosting I had) and trimmed the top layer to be level with the Jell-O.
There you have it. A finished fancy French cake! Make sure you keep it refrigerated and eat within 2-3 days or it will risk going soggy.
I had so much leftover paste that I made a second cake the following weekend! This time I drew (attempted to draw rather!) a heart pattern and filled it with homemade mango and raspberry mousse.
After I made each mousse I poured it straight into the cake tin lined with the Joconde and refrigerated over night.


